This week we began looking at the Betz Limit, and ways to
overcome it. We did some basic reseach into different types of turbines: basic (fluid, with blades), wind and
water, blade-less, vertical axis, double and triple helix. We also discovered certain
turbines designed to utilize the thermal energy coming off of the fluid to then
overcome the Betz limit. Some specific turbines that we did research into are:
- 'The Saphonian'
- Tesnik
- Tesla
We are also doing research into types of generators, and the creation of
generators. We are hoping to create both an efficient turbine design as well as a
generator to go along with it.
Week 1 Update (10/21/14)
It was decided that the project would be split into two sections during the feasibility phase. The group will begin to address the feasibility of designing its own generator, and will look into the benefits and dis-benefits of undertaking a two-pronged project.
Week 2 (10/21/14-10/30/14):
This week we continued research on different types of turbines and generators. We have decided to stick with a vertical-axis water turbine design (based off the Gorlov Helical Water Turbine). We are also still researching aspects of the Tesnik turbine, which was a vertical axis turbine that used some of the principles of the Tesla turbine to become more efficient. After meeting with Mr. Marx, we have started thinking about how to utilize the 3D printers that are available to us; we are scaling down some of our original ideas. One idea is to design turbines that sit within a downspout to harness the kinetic energy from falling rain water.
The potential to add in a mechanism that can create and harness a Magnus force is also being considered; however this is not a priority and may be beyond what is feasible for this project. The addition of a Magnus generator may also lower the overall efficiency of the turbine owing to the various loss-factors that would accompany its inclusion into the turbine.
11/3/14- Our trip to Tech Shop
Today we went to the Tech Shop for the first time! We received a tour of the different spaces and resources the tech shop has - we saw their 3D printers, laser cutter, welding studio, finishing studio, machine shop, wood shop... etc. At the end of the tour we were given a tutorial on basic hand tools. Finally, we each received member badges that allow us to enter into the shop.
Week 3 (10/30/14-11/7/14):
This week we continued to research water turbines, specifically small scale vertical axis water turbines, blade shapes, and environmental factors. As a class we traveled to Tech Shop for an overview of the space and the great resources we now have access to (see previous post). This trip allowed showed us the possibilities we have in the creation of our turbine (or turbines)- what sorts of materials and machines we have access to. Finally, this week we signed up for an Arduino course at Tech Shop. We will be using Arduino to display the amount of voltage that our turbines generate. On day 5 of this week we toyed around with the Arduino kits that we have at school - we learned the basics of Arduino that way our class at the Tech Shop can be more specific to our projects.
Week 4 (11/7/14-11/17/14):
This week we continued research on vertical axis turbines and blade designs. Additionally, this week we began designing our first prototypes on Solidworks that we hope can be printed soon so that we can test and redesign them. We took a trip on 11/11/14 to the Tech Shop. We took a a class on Arduino basics. Although confusing at times, this class was very helpful in teaching us the basics that we will need for our project. We plan to use Arduino to create a display of the voltage that our turbine generates.
Week 5 (11/17/14-11/25/14)
This week we continued to work on our design prototypes, and we made some modifications based on the ability of the 3D printer to print the desired shapes and sizes. Additionally, we worked on a few basic Darrieus, Savoinus, and Gorlov designs to compare our turbines efficiency and power generation to. Below are images of one of the parts for the Tesnik-Gorlov turbine, as well as the flow simulator that Rohun set up on Solidworks. We plan to modify the Tesnik-Gorlov design we printed and then print the Savonius and Gorlov designs on monday. The Savonius should print fine, but the Gorlov design has to be modified so that, instead of printing in one piece, it can be printed in multiple pieces and assembled. Additionally, this week we drew up plans to create our model gutter environment and ordered some gutter-pipe as well as a clear material to place on one side of the gutter. We will assemble our gutter environemnt as soon as the parts come in.
Dec 7th, 2014
Week 1 Update (10/21/14)
It was decided that the project would be split into two sections during the feasibility phase. The group will begin to address the feasibility of designing its own generator, and will look into the benefits and dis-benefits of undertaking a two-pronged project.
Week 2 (10/21/14-10/30/14):
This week we continued research on different types of turbines and generators. We have decided to stick with a vertical-axis water turbine design (based off the Gorlov Helical Water Turbine). We are also still researching aspects of the Tesnik turbine, which was a vertical axis turbine that used some of the principles of the Tesla turbine to become more efficient. After meeting with Mr. Marx, we have started thinking about how to utilize the 3D printers that are available to us; we are scaling down some of our original ideas. One idea is to design turbines that sit within a downspout to harness the kinetic energy from falling rain water.
The potential to add in a mechanism that can create and harness a Magnus force is also being considered; however this is not a priority and may be beyond what is feasible for this project. The addition of a Magnus generator may also lower the overall efficiency of the turbine owing to the various loss-factors that would accompany its inclusion into the turbine.
11/3/14- Our trip to Tech Shop
Today we went to the Tech Shop for the first time! We received a tour of the different spaces and resources the tech shop has - we saw their 3D printers, laser cutter, welding studio, finishing studio, machine shop, wood shop... etc. At the end of the tour we were given a tutorial on basic hand tools. Finally, we each received member badges that allow us to enter into the shop.
 |
| Front desk at Tech Shop. The desk was built using the CNC wood router in wood shop area of the Tech Shop. |
 |
| Project area/make space |
 |
| Objects made or modified using the laser cutter |
 |
| Image created using the laser cutter. An image from google was imported and then burned, using the laser cutter, onto the wood. |
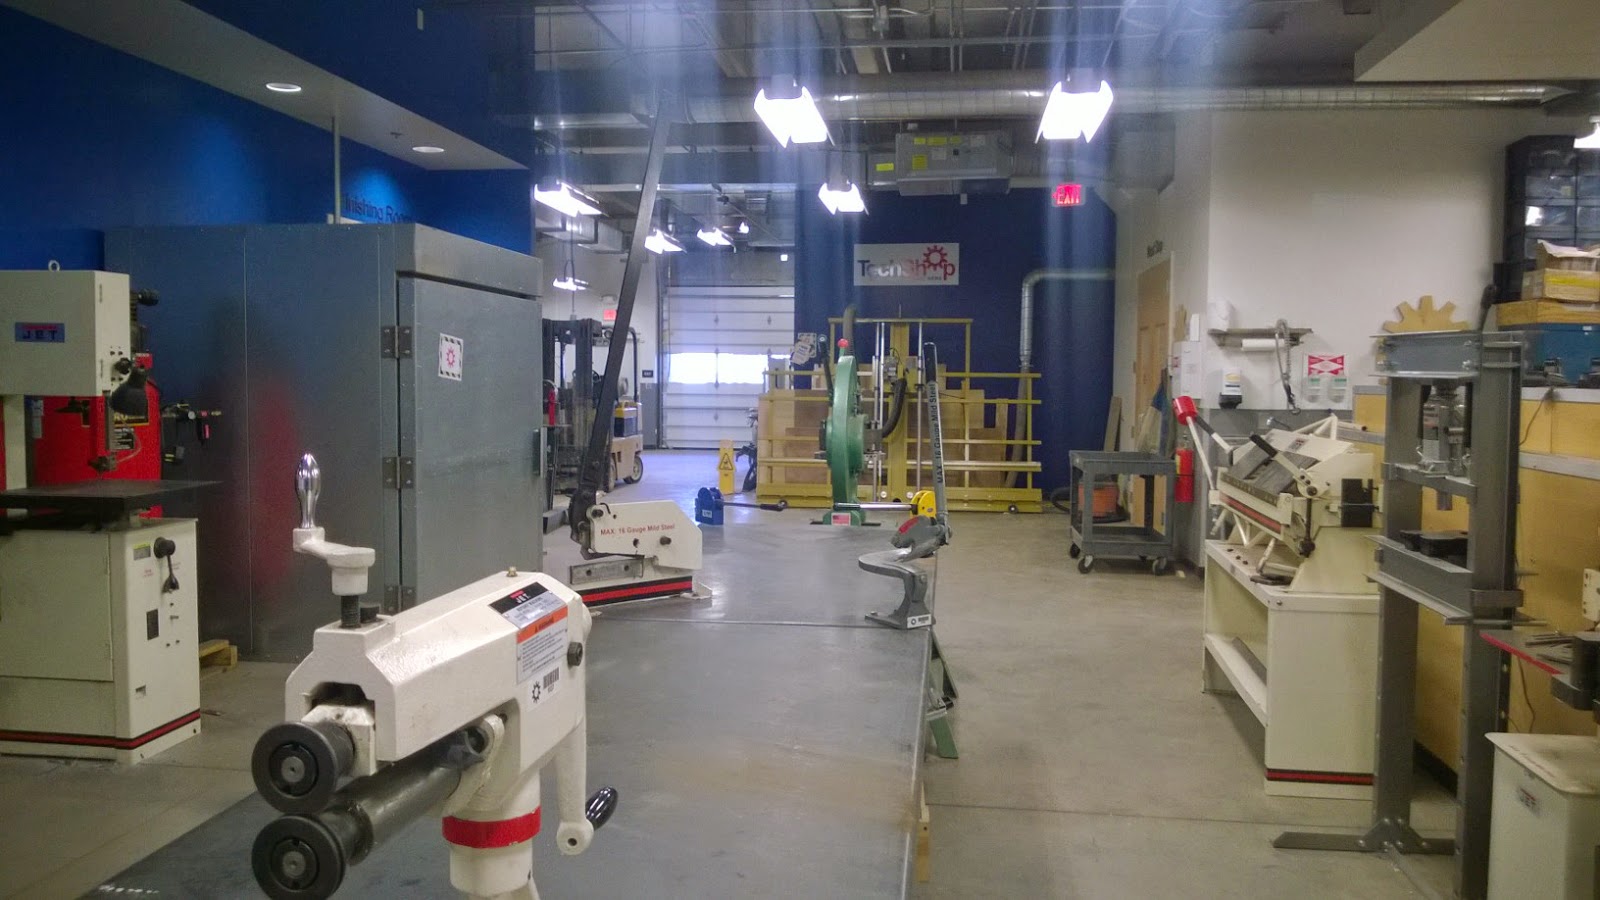 |
| metal working space of the Tech Shop |
 |
| Tech Shop's 3D printers. Behind these printers is the Autodesk design suite. |
Week 3 (10/30/14-11/7/14):
This week we continued to research water turbines, specifically small scale vertical axis water turbines, blade shapes, and environmental factors. As a class we traveled to Tech Shop for an overview of the space and the great resources we now have access to (see previous post). This trip allowed showed us the possibilities we have in the creation of our turbine (or turbines)- what sorts of materials and machines we have access to. Finally, this week we signed up for an Arduino course at Tech Shop. We will be using Arduino to display the amount of voltage that our turbines generate. On day 5 of this week we toyed around with the Arduino kits that we have at school - we learned the basics of Arduino that way our class at the Tech Shop can be more specific to our projects.
Week 4 (11/7/14-11/17/14):
This week we continued research on vertical axis turbines and blade designs. Additionally, this week we began designing our first prototypes on Solidworks that we hope can be printed soon so that we can test and redesign them. We took a trip on 11/11/14 to the Tech Shop. We took a a class on Arduino basics. Although confusing at times, this class was very helpful in teaching us the basics that we will need for our project. We plan to use Arduino to create a display of the voltage that our turbine generates.
Week 5 (11/17/14-11/25/14)
This week we continued to work on our design prototypes, and we made some modifications based on the ability of the 3D printer to print the desired shapes and sizes. Additionally, we worked on a few basic Darrieus, Savoinus, and Gorlov designs to compare our turbines efficiency and power generation to. Below are images of one of the parts for the Tesnik-Gorlov turbine, as well as the flow simulator that Rohun set up on Solidworks. We plan to modify the Tesnik-Gorlov design we printed and then print the Savonius and Gorlov designs on monday. The Savonius should print fine, but the Gorlov design has to be modified so that, instead of printing in one piece, it can be printed in multiple pieces and assembled. Additionally, this week we drew up plans to create our model gutter environment and ordered some gutter-pipe as well as a clear material to place on one side of the gutter. We will assemble our gutter environemnt as soon as the parts come in.
 |
| 3D part in the freezer before right after it was printed |
 |
| Part of the Tesnik-Gorlov turbine design |
 |
| Flow simulator on Solidworks |
This week we printed, assembled, and reprinted savonius and gorlov-tesla designs. We will continue to create and print more iterations of the turbines to be tested in our planned gutter/downspout environment. We purchased the materials needed to create the gutter/downspout environment and we will be building it in the coming class periods. We ordered a few other parts and looked at potential classes to take so as to utilize our memberships to TechShop. We tested the reprinted tesla inner core:
We also created a FloXpress tutorial (see tutorial pages).
Dec 13th, 2014
We continued to design and redesign the Gorlov and Savonius turbines. We also finished the gutter environment, and created a basic assembly to hold the turbines in place while they spin. We also farmiliarized ourselves with the workifile:///Users/siefertel/Desktop/IMG_8992.MOVngs of the Magnetic field sensor, and created a basic mechanism through which the speed of rotation of the turbine can be measured.

January 21st:
In the past two weeks we worked to create a more realistic gutter environment. We made this by attaching two gutter pipes to a downspout and then attaching all of this to a piece of plywood. We reprinted the three-blade Savonius to a size that would fit into the gutter (but the printer ran out of "ink" so we will be reprinting this model soon). We tested both the Savonius and Gorlov designs in the gutter environment. On the first trial quite a bit of water leaked out of the gutter environment. With a little bit of duct tape we repaired the leaks and then ran water through it again. We noticed that when the water hit the Gorlov turbine it spun very fast, but if the water did not hit the blades correctly, the turbine did not spin. We noticed that the Savonius spun more constantly but not as fast. We plan to redesign the Savonius with aspects of the Gorlov blades (light-weight air foil designed blades) and then print multiple iterations with different numbers of blades.
Wednesday, February 4th
After testing the turbines, we decided to remodel the Savonius turbine with a lighter, and air-foil design on the blades. These were printed once, but were too big to fit into the gutter environment. On a second print they fit. We printed one with two blades, one with three blades, and one with four blades. We will begin testing these in their gutter environment ASAP.


Dec 13th, 2014
We continued to design and redesign the Gorlov and Savonius turbines. We also finished the gutter environment, and created a basic assembly to hold the turbines in place while they spin. We also farmiliarized ourselves with the workifile:///Users/siefertel/Desktop/IMG_8992.MOVngs of the Magnetic field sensor, and created a basic mechanism through which the speed of rotation of the turbine can be measured.
Dec 19th, 2014
Today we put everything together and then tested our design. We found that the turbine does not turn when the water is poured dead center dowfn the downspout; but rather, the turbine turns when the water hits one side of it. We are working to tweak the blade design to see how that affects how the turbine turns and we also plan to test the Savonius version once it prints. Finally, we plan to build a ramp of sorts for the water to flow on before reaching the turbine and we hope that the ramp can displace the water so that it can hit the Turbine on its side. The only downside to this is that it may slow down the velocity of the water but we are going to test it first to see. Below are three videos of us testing the turbine-in-downspout build. The turbine does not turn in the first video because the water is being poured straight on.
January 21st:
In the past two weeks we worked to create a more realistic gutter environment. We made this by attaching two gutter pipes to a downspout and then attaching all of this to a piece of plywood. We reprinted the three-blade Savonius to a size that would fit into the gutter (but the printer ran out of "ink" so we will be reprinting this model soon). We tested both the Savonius and Gorlov designs in the gutter environment. On the first trial quite a bit of water leaked out of the gutter environment. With a little bit of duct tape we repaired the leaks and then ran water through it again. We noticed that when the water hit the Gorlov turbine it spun very fast, but if the water did not hit the blades correctly, the turbine did not spin. We noticed that the Savonius spun more constantly but not as fast. We plan to redesign the Savonius with aspects of the Gorlov blades (light-weight air foil designed blades) and then print multiple iterations with different numbers of blades.
Above: water is poured into the gutter system and the Gorlov turbine barely spins.
Above: water is poured directly onto the Gorlov turbine back blade and the turbine spins very quickly.
Above: water is poured onto the Savonius turbine and the turbine spins very quickly.
Wednesday, February 4th
After testing the turbines, we decided to remodel the Savonius turbine with a lighter, and air-foil design on the blades. These were printed once, but were too big to fit into the gutter environment. On a second print they fit. We printed one with two blades, one with three blades, and one with four blades. We will begin testing these in their gutter environment ASAP.
We are also working to finalize our testing environment. One problem we encountered was that when placing the turbines within the gutters, we were not able to secure the turbines to the dowel rods due to the way we designed the downspouts. Thus, we are working to design a new downspout environment where the front can be taken off and a turbine, glued to a dowel rod, can be slid in (instead of putting the turbine in the side and sliding the dowel rod through the whole in the side of the turbine). As soon as this is finished testing will proceed.
Tuesday, February 24th
The generator housing broke when I attempted to warp it for the first time. I redesigned the housing to make the struts thicker,
In regard to the different turbine designs...
In the past few weeks we have printed many different iterations of the Gorlov, Savonius, and Tesla designs. We have also printed a single iteration of the bucket design and will be printed a second iteration today. After printing the turbines, we attached them to wooden dowel rods using super glue and silicon sealant.
Next, we assembled a gutter where a turbine can be placed in the gutter and taken out easily (removable acrylic cover on the gutter). This assembly allows us to use one gutter pipe to test multiple different turbines.
Next, we added a funnel to our assembly, so as to direct the water that falls down the gutter onto the blades of the turbines (rather than the center/axel-point).
After finishing the assembly, we moved on to test the turbines. Because we have so many iterations of each type of turbine (three Savonius, two Gorlov, two Tesla, one bucket), we ran our first tests by simply pouring a cup of water down the funnel and onto the turbine, and observing which turbines worked the best (rotational speed based on how fast the water was being poured). We used these basic tests to rule out the Gorlov and tesla designs and will run our next tests, on the two-blade and three-blade Savonius and bucket design quantitatively.
Here are some videos of the more successful trials (three blade and four blade Savonius, bucket design). We were unable to test the bucket design in the gutter environment because it was a little bit too big. We are printing a smaller iteration for testing.
3/2/15-
Since the last post, we have been working on the creation of the generator and a design for a set of gears to increase the efficiency of the turbine-generator combo.
 |
| This is a picture of the generator and a 3D print of the gears present on the generator. |
In many larger-scale wind and water turbines, the gearing ratios are close to 90:1, and those of smaller turbines are often 30:1. Because of the scale of our turbines, we are not aiming for a gearing ration that high. We are looking to increase the efficiency by even the smallest amount.We are in the process of designing two gears, one larger and one smaller, which together, with the generator, will function as our "gear box".
4/7/15
Since the last post, we collected data, finalized an iteration of the generator, and presented our project at the PRSEF (Pittsburgh Regional Science and Engineering Fair). We measured average RPMs of the different types of turbines (see image for set up) and concluded that the Three-Blade Savonius and the Two-Scoop Savoinus. We received great feedback, and ended up winning two sponsor awards at the fair!! 
No comments:
Post a Comment